Thursday, December 29, 2011

Paper Bows - Using up my stash!

Do you ever make New Year's resolutions? One of my goals for the New Year is to "shop my stash" more often and to make a dent in the enormous amount of scrapbooking paper and embellishments I have.  Of course, I hope to make lots of layouts and cards but I am also going to be more purposeful in looking for ways in which I can use my paper in other projects too. There are just some papers I have which are not my style anymore or which I bought in bulk and just need to use up. So I hope to share some of the projects I find every once in awhile and here is my first find.

I love this idea for using up my extra scrapbooking paper: http://aphradeedesigns.blogspot.com/2010/07/paper-bow-tutorial.html

I will need to practice but here are my first couple of attempts. My bows got a little squished because I am too cheap thrifty to use glue dots and I stapled through my bow layers.

I had enough leftovers to make a little gift card and of course it coordinates perfectly!

Pin It

Wednesday, December 28, 2011

All Decked Out - Snowman Card

I spent yesterday and today making a bunch of snowman cards using All Decked Out. It is such a fun stamp set to embellish! I thought about using different hats and scarves on each card to personalize them a bit, but in the end I decided that it would make the process faster and simpler to make them all with the same hat and the same scarf. I needed 9 cards to use as thank you cards for my students and then I wanted a few extras.

I started off by stamping a snowman with arms, a face, and snowflakes on a 3.5" x 5" piece of White Daisy cardstock. Then I repeated this about 12 more times. Sorry for the out of focus picture!

Then I stamped the hat I chose on a patterned piece of paper as well as on a solid piece of Sky cardstock multiple times. I also stamped the scarf on Sky cardstock and then I cut out the hats, hat bands, and scarves. I layered the Sky hat band onto the patterned paper hats.

Next, I "dressed" the snowmen in their hats and scarves and inked up the edges of the White Daisy cardstock pieces in Moonstruck ink. I also colored the carrot noses with an orange colored pencil.

I inked up the edges of some old patterned paper (from Twitterpated) in Moonstruck ink and attached them to card bases.Then I attached the White Daisy snowman stamped pieces to these card bases. I added some silver Glitz to some of the snowflakes and Liquid Glass to the carrot noses.

After the cards were dry, I added Sunset ink to some mini paper flowers and added mini sparkles to the middles. I added these flowers to the hats. I also added some ribbon to the card. Here is the final card.
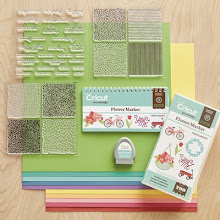
Supplies used (all CTMH): (D1308) All Decked Out stamp set, Sky stamp pad, (Z2134) Moonstruck stamp set, (Z2124) Grey Flannel stamp pad, (Z2117) Crystal Blue Stamp pad, (Z2105) Black stamp pad, (Z2114) Cocoa stamp pad, (Z1482) Silver Glitz glitter gel, (Z679) Liquid Glass, blue ribbon, mini paper flowers, (retired) Sweet Home paper, (retired) Twitterpated paperPin It

Sunday, December 18, 2011

Backyard Fun - Studio J Layout

Whew...I feel like I am just coming up for air! The fall is always really busy so I tried to be prepared this year but, as my workload increased, certain things (like my creative pursuits) had to make way. I really miss it when I can't craft!

Studio J has been such a wonderful way for me to sneak in some crafting time even when things are hectic. I don't have to worry about clearing out a space and getting out all of my materials out which all takes time (and then cleaning up after which takes even more time). I love working with actual paper and ink and stamps.  But it is nice when I have limited time to just turn on the computer, sign in, and start experimenting with my layouts. If I need to go do something in the middle, my project gets saved automatically. If I come back and don't like it, I can rearrange it or just start all over without having to worry about "ruining" my paper!

This layout is a 14 picture layout called Snappy and it's available to Studio J members. You could easily turn it into a 16 picture layout by converting the title box and the journaling box into photo wells. I deleted my title box and just used the letters from the Quick Title Tool in its place. I left my journaling box as is and I also added a small journaling box to the bottom right of the left page so I could include the date separately.

Here is the Love Your Layout video for December from Close to My Heart. It gives some great tips about how to personalize your layout including a different way to make a border by cropping Stickease. Click on the arrows in the bottom right of the embedded screen to expand the video.

Pin It
Related Posts Plugin for WordPress, Blogger...