I have long been waiting for Close to My Heart to come out with a panda stamp since that is the mascot of the school where I work. It would come in so handy for cards for the students and staff!
By chance, I came across
this amazing video tutorial made by
Stephanie Davis. She shows you how to turn Close to My Heart's Cute Koalas stamp (D1642) into a panda! I do recommend watching the video but essentially you mask the koala's nose with a piece of tape when inking up your stamp. Before stamping, you simply remove the tape. In her video, she also masked the stomach but since I was using a different koala stamp from the same set, it ended up being too complicated for me to do that. Then you use a capital "O" and a lower case "o" to make the ring around the eyes. I was blown away! So of course, I had to try it.
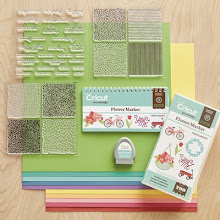
Here are all of the stamp sets I used.
Since I would be coloring, I stamped with
Memento ink to avoid smearing.
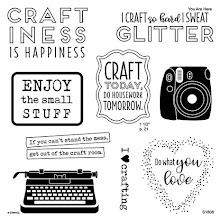
So, after taping off the nose and stamping the "O's," the koala looks a lot like a little panda (without a nose). The eucalyptus even looks like bamboo to me!
Here's a progression of photos to show you how I colored the panda.
As Stephanie explains in her video, start with your lighter gray and then add shadows with the darker. Then go back in with the lighter to blend.
Since pandas have a band of black across their chests where their arms are, I just colored in where I thought it would go.
Then I darkened it in!
I colored in the bottom and feet using the same concepts. Since I couldn't mask that "tummy" line very well, I just kept it in and used it!
Next, I colored in around the eyes and added a nose.
I used the Light Orange, just like Stephanie, for the ears and to add color to the cheeks.
After using the Colorless Blender, the ears and cheeks look more subtle and then I added Pastel Green to the bamboo.
I stamped, colored and cut out a bunch of pandas to begin with.
Don't they look cute!
Then I worked on the card base. I used papers from
Zoe,
Florence, and
Magical. I also embossed strips of Pear.
I did use one retired product, which I miss a lot! Loved these borders but I did hoard them so I'm still able to use them.
My final result was this card.
Since I had to make a lot of thank you cards, I ran out of my background paper so I subbed another similar one from a retired paper pack. Bonus points if you know the name of that paper pack!
Pin It